Marble Care - Water Stain / Marks
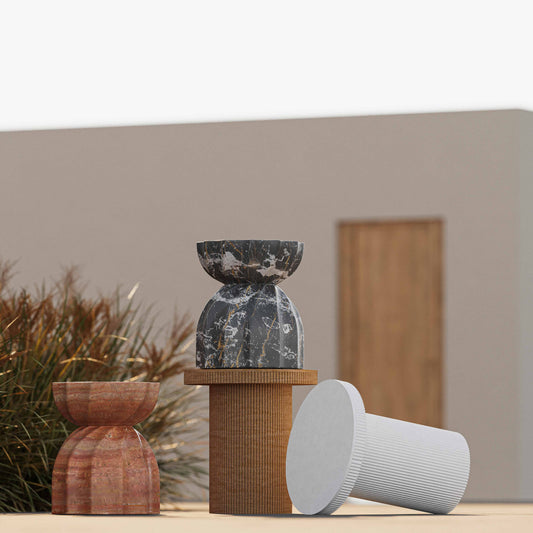
Quarried stone or marble contains natural fissures along with color variations. These are not considered defects as they enhance
Properly Sealing Marble
- You'll need:
- A cleaner designed for natural stone
- Microfiber cloths
- Granite or natural stone sealer

Avoid sealers with acidic ingredients like citrus solvent. These will actually damage your marble.
Step 1: Deep Clean the Stone You Plan to Seal
It’s a good idea to remove any stains as part of this cleaning process because the sealant will also help to lock in stains — which, of course, is something you want to avoid.
After cleaning, dry the counter thoroughly. If there is any doubt whether the stone is completely dry, error on the side of caution. Sealers require very dry stone to perform at their highest.
Step 2: Apply Sealer With a Soft Cloth, Lambs Wool or Soft Brush
Application of any sealer should be in accordance with the manufacturer’s instructions. Some manufacturers provide specific techniques and sealer amounts required for various stone types and their finish ie polished, honed, flamed. Read the directions and inquire with a representative for further clarity.
Some companies will recommend 1 coat and others may recommend 2 or more. An optimal result with any manufacturer’s sealer is typically associated with the following:
- You'll need:
- Make yourself aware of any precautions listed by the manufacturer before you start your project.
- ALWAYS TEST PRODUCT ON A SMALL AREA AND WAIT 24 HOURS FOR DESIRED RESULTS.
- Start with a clean, completely dry stone.
- Apply the proper quantity of sealer.
- Allow for the manufacturers recommended dwell times between coats.
Step 3: Remove the Sealer
Next, remove the excess sealer from the areas you’ve sealed. Some of the sealant will be absorbed by the stone itself. However, once a stone is sealed, there’s usually a bit of excess sealant on the surface.
Using a soft cloth, wipe up any sealer left on the surface. We like microfiber cloths for this purpose. They’ll soak up leftover sealer without leaving fiber on the counter. Do not let the sealant dry on the counter.
Step 4: Apply Additional Coats of Sealant (As Needed)
Applying more than one coat of sealer is normal. In fact, in some cases it’s recommended to ensure an even coverage.
The more porous the stone, the more likely you’ll need to apply additional coats of sealant. Luckily, more absorbent stone also means less waiting time between coats of sealant.
In general, it’s a good idea to wait at least 15 minutes before applying a second coat of sealant. This will allow the first layer to be fully absorbed by the stone.
Seal Marble
If customer is not sure whether the stone table needs sealing, there are a couple simple tests to figure it out:
Mineral Oil Test
- Put a few drops of mineral oil in an out-of-the-way spot on the marble.
- Wait ten minutes, then wipe up the mineral oil with a dry cloth.
- If a dark stain shows when you wipe up the mineral oil, it’s time to reseal your marble table.
Don’t worry if the mineral oil leaves a mark. Even if the marble need to be sealed, the dark spot from the mineral oil will evaporate in about 30 minutes.
Water Drop Test
- Sprinkle a few drops of water on the marble table.
- Check to see whether the stone darkens and absorbs the water.
- If it absorbs the water in four minutes or less, the stone needs to be resealed.
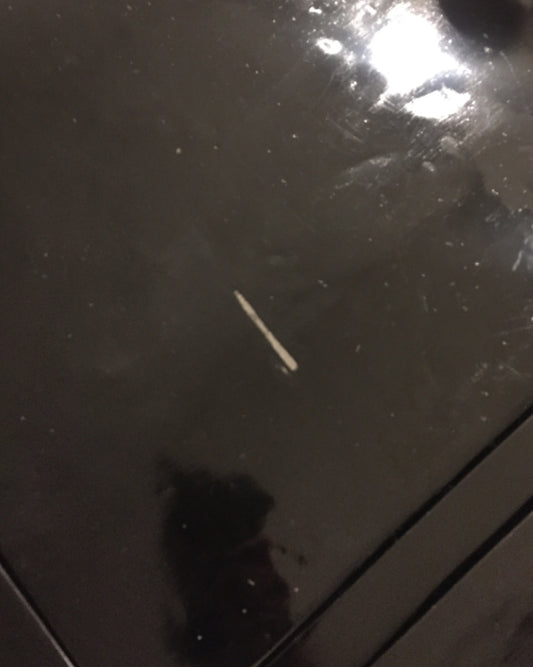
Used Item that has stains or marks
Why do stains happen?
-
Water
If it's regular, relatively soft water, then these rings will just evaporate after a day or so as on any porous stone. If it's particularly hard water, then the rings might be a collection over time of minerals from the water and therefore of course won't evaporate.
-
Other liquids
Staining is when liquids like red wine or coffee get into the pores of the stone and leave behind a hint of their coloring.
Etching is when acids like lemon juice dull the surface of the stone and create ghosting of where the liquid once was when seen under certain lighting.
For the most part, there isn’t much that can be done to prevent etching, but sealing will help prevent stains
Clean Stains
Types of Stains and First Step Cleaning Actions
WATER SPOTS AND RINGS
Buff with dry 0000 steel wool.
OIL-BASED
(grease, tar, cooking oil, milk, cosmetics)
An oil-based stain will darken the stone and normally must be chemically dissolved so the source of the stain can be flushed or rinsed away. Clean gently with a soft, liquid cleanser with bleach OR household detergent OR ammonia OR mineral spirits OR acetone.
ORGANIC
(coffee, tea, fruit, tobacco, paper, food)
May cause a pinkish-brown stain and may disappear after the source of the stain has been removed. Clean with 12% hydrogen peroxide (hair bleaching strength) and a few drops of ammonia.
METAL
(iron, rust, copper, bronze)
Iron or rust stains are orange to brown in color and follow the shape of the staining object such as nails, bolts, screws, cans, flower pots, metal furniture. Copper and bronze stains appear as green or muddy-brown and result from the action of moisture on nearby or embedded bronze, copper or brass items. Metal stains must be removed with a poultice. Deep-seated, rusty stains are extremely difficult to remove and the stone may be permanently stained.
INK
(magic marker, pen, ink)
Clean with bleach or hydrogen peroxide (light colored stone only!) or lacquer thinner or acetone (dark stones only!)